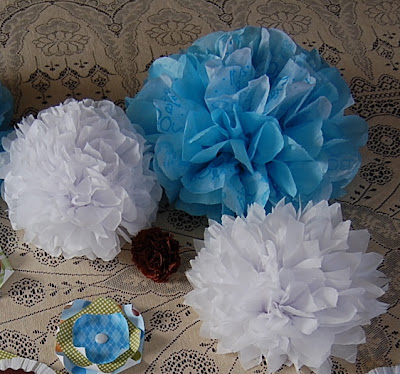
I'm doing several different tutorials on shower decorations
that can be used for baby or bridal showers.
Today it's
HOW TO MAKE POM POM TISSUE FLOWERS
These are different than the ones made popular in the 70's.
What you will need:
8-12 sheets of tissue paper (thin tissue works better
than heavy-weight)
than heavy-weight)
string, curling ribbon or pipe cleaner
scissors
For this tutorial I used 6 pieces of white tissue paper
cut to 10" x 20" to make a 10" pom pom flower.
You will need 8-10 pieces to make a fuller flower and
probably 12 sheets to make a 20" tissue flower.
probably 12 sheets to make a 20" tissue flower.
Whatever width you choose will be the size of your flower.
Fold in half to find center and then tie with string,
curling ribbon or pipe cleaner.
Determine the length of string or ribbon
if you want to hang the flower.
You can tie string to the pipe cleaner after finishing the flower
if using a pipe cleaner.
Cut each end of the fan ~
a point to make a pointed tip flower or
curved for round petals.
if you want to hang the flower.
You can tie string to the pipe cleaner after finishing the flower
if using a pipe cleaner.
Cut each end of the fan ~
a point to make a pointed tip flower or
curved for round petals.
Start separating each piece of tissue paper,
being careful not to tear the tissue.
being careful not to tear the tissue.
Continue separating the fan and pulling each piece
and fluffing as you go.
and fluffing as you go.
Repeat on other side.
Voila!
Now you can make your own!
You can leave one side flat for lying on surfaces
or make round like a ball.
or make round like a ball.
These look beautiful displayed on tables
or hung for decorating.
or hung for decorating.
Have fun decorating for your next event.
Next tutorial: flat paper flowers.
~ Julie


These are wonderful! Thanks so much for showing us how.
ReplyDeleteI love your big pom pon flowers. My daughter, who is not normally crafty at all, discovered these watching Martha Stewart and made a bunch of them for a recent parent's weekend. It was so festive.
ReplyDeleteI've always loved these big pom pom flowers. I have all the stuff to make some, but just haven't gotten around to it yet :)
ReplyDelete~tricia
Brings back memories of us making them as kids! Thanks for the reminder of how to, it's been a LONG time! Hope you have a wonderful weekend.
ReplyDeleteCindy
This is so easy I think I can make these! Thanks for the tutorial!!! Yours are beautiful!!!
ReplyDeleteThese are sooo cute, gal! Thanks for the tutorial! I might have to make some for Sam's baby shower! I am hosting it after the baby comes...which should happen any day now!!
ReplyDeleteHugs to you sweetie!
Have a joyful Sunday!
Becky